Passing physical disks to Proxmox VMs
There are legitimate reasons to give a Proxmox VM direct access to a physical disk: TrueNAS and OpenMediaVault both work better (or just work more correctly) with direct disk access rather than a virtual disk backed by a host storage pool. Here’s how to do it, the tradeoffs involved, and when you’d want a different approach entirely.
Two ways to give VMs disk access
Method 1: Disk passthrough (qm set)
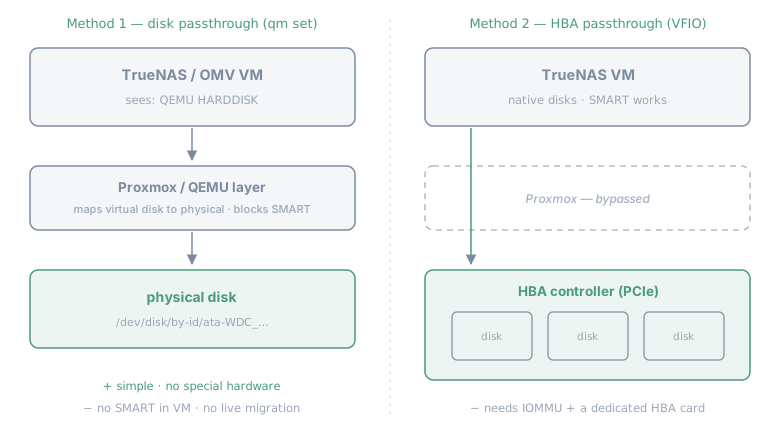
The VM gets a virtual disk that maps 1:1 to a physical disk. The disk appears to the VM as “QEMU HARDDISK.” Simple to set up, no special hardware needed.
Method 2: HBA/controller passthrough (PCIe passthrough) The entire SATA or SAS controller gets handed to the VM via VFIO. The VM talks directly to the hardware, sees disks as native devices, gets SMART data, the whole thing.
For most homelab NAS setups, disk passthrough is sufficient. Controller passthrough is worth the extra complexity if you need SMART data inside the VM or are running software RAID that needs direct hardware visibility.
This post covers disk passthrough.
Limitations worth knowing upfront
Before you set this up, understand what you’re giving up:
- No SMART data inside the VM. The virtualization layer blocks raw SMART access. If your NAS VM reports disk health, it’s getting that from Proxmox’s view of the disk, not directly.
- No live migration. A VM with passed-through disks can’t be migrated to another Proxmox node without stopping it first.
- No snapshots on that disk. Proxmox can’t snapshot a passed-through disk the way it snapshots virtual disks. Your VM software handles backups.
- Exclusive use. Once a disk is passed through to a VM, Proxmox can’t also use it for host storage.
These are real constraints but not blockers for the typical use case of “I want to run TrueNAS in a VM with real disks.”
Finding your disk identifiers
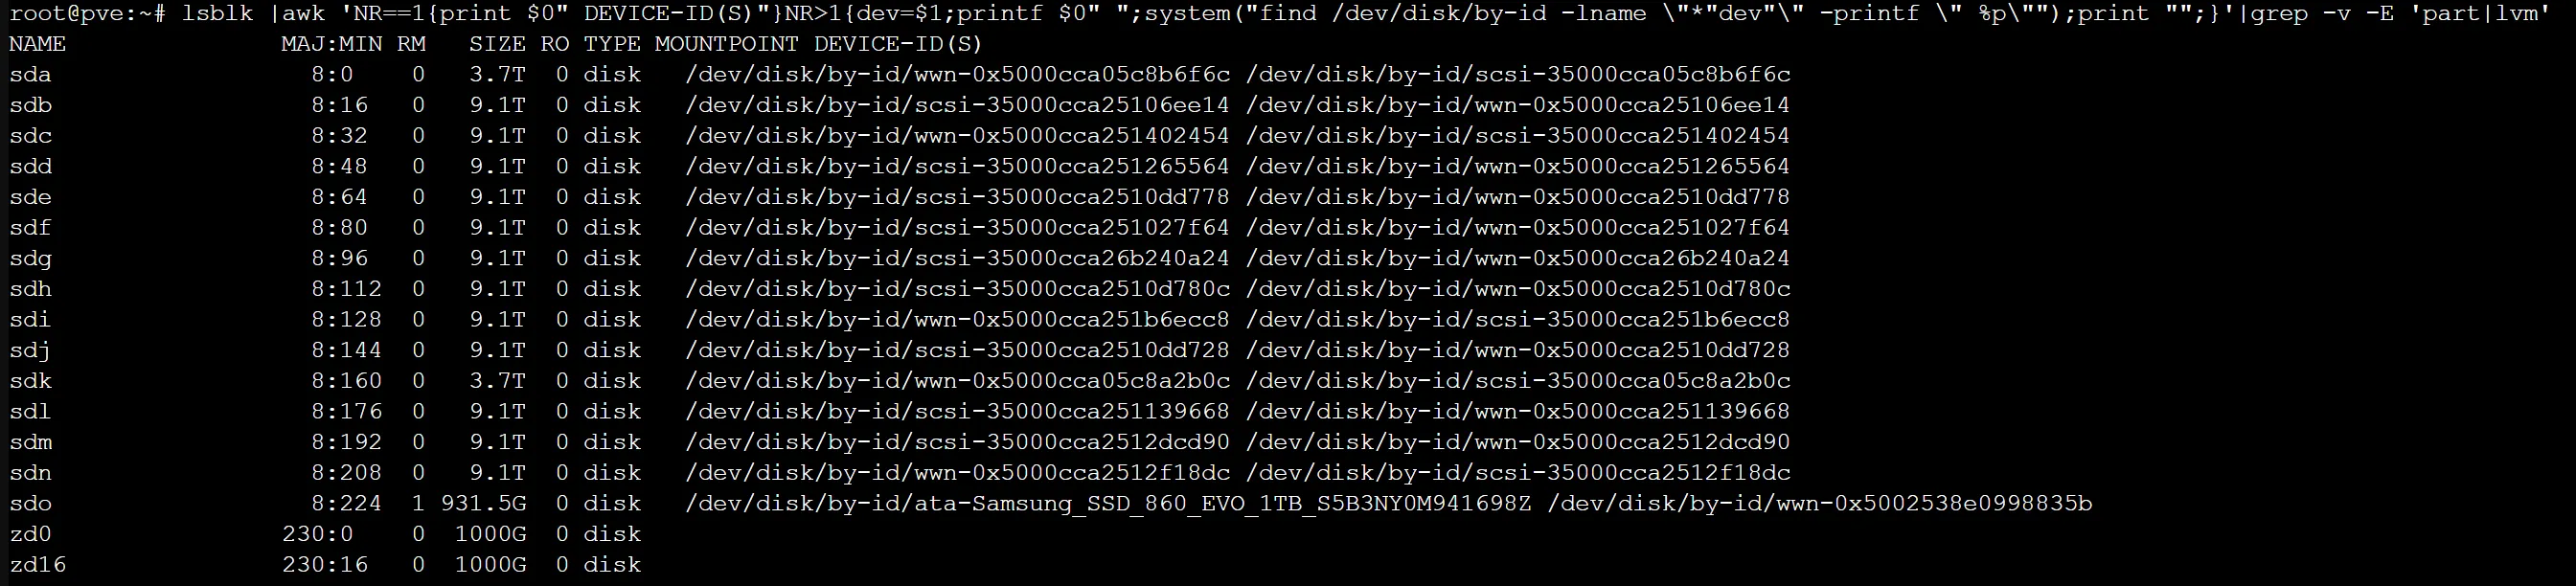
You need the /dev/disk/by-id/ path for each disk you want to pass through. Don’t use /dev/sda — those names shift after reboots. (Full explanation here.)
ls -l /dev/disk/by-id/ | grep -v partThis lists all disks without partitions. Note the full path for each disk you want to pass through — something like:
/dev/disk/by-id/ata-WDC_WD40EFRX-68N32N0_WD-WCC7K1234567On a node with a lot of drives, it helps to see the by-id paths inline with lsblk output — the awk one-liner visible in the prompt here joins the two:
Adding disks to a VM
Use qm set with a --scsi, --sata, or --virtio argument depending on your VM’s controller type. SCSI with the VirtIO SCSI controller is generally the right choice for Linux VMs; SATA works universally.
# Add first disk (scsi1, scsi2, etc. — pick the next available slot)qm set <VMID> --scsi1 /dev/disk/by-id/ata-WDC_WD40EFRX-68N32N0_WD-WCC7K1234567,backup=0
# Add a second diskqm set <VMID> --scsi2 /dev/disk/by-id/ata-WDC_WD40EFRX-68N32N0_WD-WCC7K7654321,backup=0
Replace <VMID> with your VM’s ID (visible in the Proxmox sidebar). backup=0 tells Proxmox not to try to back up this disk through its backup system — since it can’t snapshot it anyway, this prevents errors.
Check what slots are already in use before adding:
qm config <VMID>Look at the existing scsi0, scsi1, etc. entries. Don’t overwrite your VM’s boot disk.
Verifying it worked
After adding, start (or restart) the VM and check from inside it:
lsblkThe passed-through disks should appear as additional block devices. In a TrueNAS VM, they’ll show up in the disk management UI and be available to assign to pools.
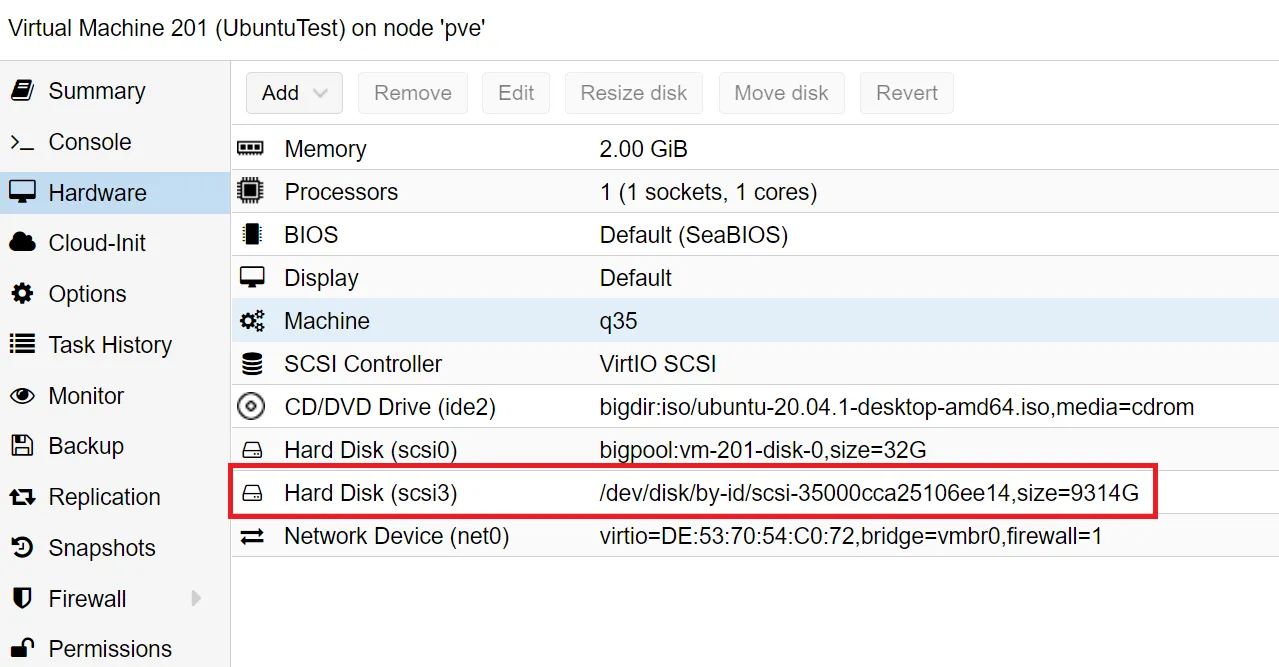
From the Proxmox side, qm config <VMID> will show the new scsi entries in the VM’s configuration, and the disk appears in the VM’s Hardware tab with its full by-id path:
When to use controller passthrough instead
If you have a dedicated HBA card (like an LSI 9207-8i or similar) and you want the VM to have complete, native access to everything on it — including SMART data, native queue depths, and raw device visibility — PCIe passthrough via VFIO is the better approach.
The setup is more involved (requires IOMMU enabled in BIOS, the VFIO kernel modules, and careful attention to IOMMU grouping), but for a serious NAS VM that you care about deeply, it’s the right architecture.
For a homelab TrueNAS or OMV VM where you mostly want ZFS to see real disks and you’re not relying on SMART alerts from inside the VM, disk passthrough via qm set works well.
Related: ZFS storage in Proxmox · LVM Thin Pools in Proxmox
Next in “Proxmox storage, in the order you meet it” Migrating a ZFS pool to new drives in Proxmox →