Identifying ZFS disks with /dev/disk/by-id/
If you’re setting up ZFS — whether on Proxmox, TrueNAS, or a plain Linux box — you’ll quickly run into /dev/disk/by-id/ identifiers and wonder why you can’t just use /dev/sda. Here’s the short answer, and how to actually make sense of which identifier maps to which physical drive.
Why not /dev/sda?
Linux assigns /dev/sda, /dev/sdb, etc. dynamically at boot based on the order the kernel discovers devices. Add a USB drive, swap a cable, reboot after a hardware change — and /dev/sdb might now point to a completely different disk than it did before.
For ZFS, that’s a problem. If a disk’s path shifts, ZFS may fail to import the pool or silently reference the wrong device.
/dev/disk/by-id/ identifiers are persistent. They’re derived from the disk’s serial number, so they follow the physical drive regardless of which port it’s plugged into. ZFS uses these by default for exactly this reason, and you should too.
Listing available identifiers
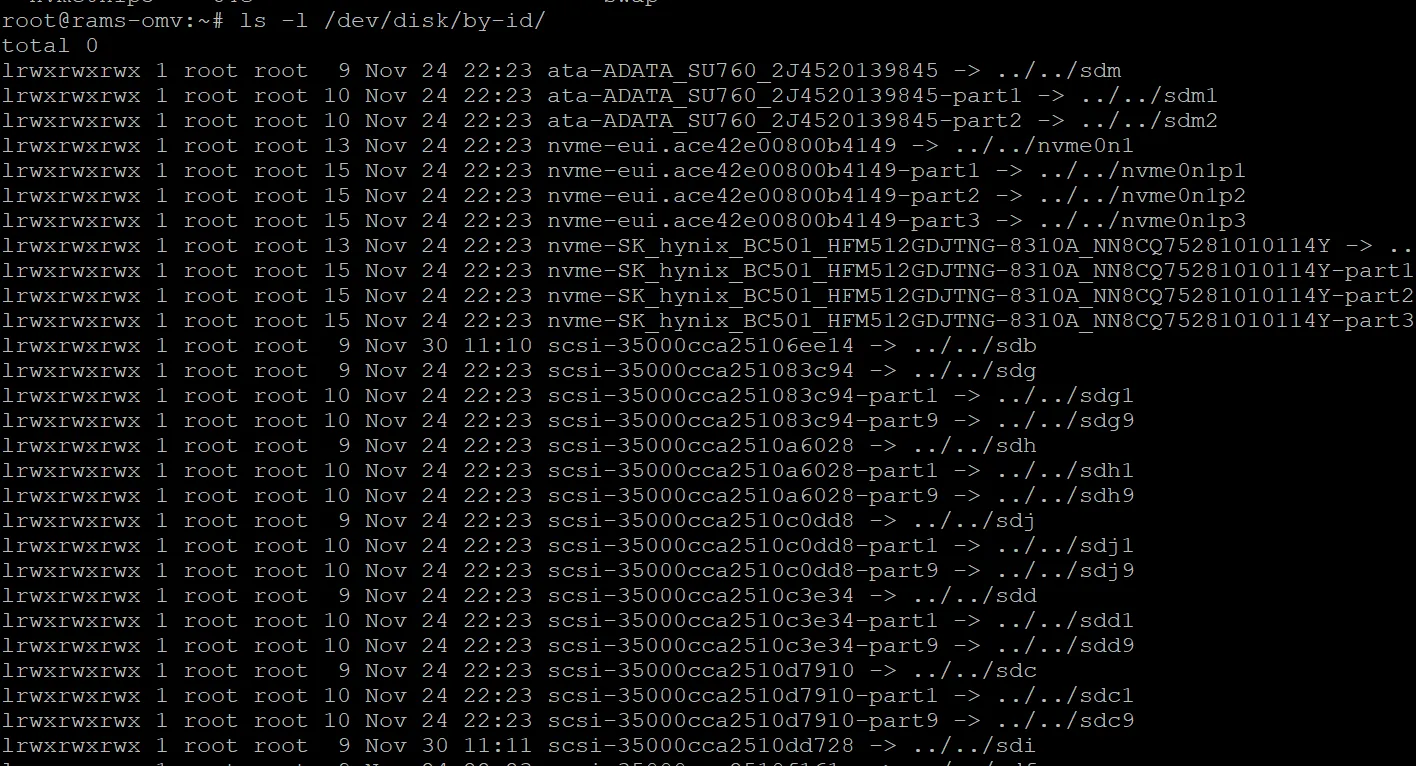
ls -l /dev/disk/by-id/This shows symlinks for every disk on the system. Each one points back to a /dev/sdX device, and the name encodes the device type, model, and serial number — something like:
ata-WDC_WD40EFRX-68N32N0_WD-WCC7K1234567 -> ../../sdbThe serial number (WD-WCC7K1234567 in this case) is the key piece.
Here’s what that looks like on a real box — SATA SSDs, NVMe drives, and a stack of SAS disks, each symlinked back to whatever /dev/sdX name the kernel happened to assign this boot:
Matching pool members to physical drives
This is the situation you actually need to solve: your ZFS pool is showing a disk by its /dev/disk/by-id/ path, and you need to figure out which physical drive that is — so you can pull the right one when something fails.
Step 1: Check the pool
zpool status -v tankReplace tank with your pool name. The output lists each member disk by its full /dev/disk/by-id/ path.
Step 2: Get serial numbers from the system
lsblk -o NAME,SIZE,SERIAL,LABEL,FSTYPEThis lists all block devices with their serial numbers.
Step 3: Match them
The serial number in lsblk output is embedded in the by-id path. If zpool status shows:
ata-WDC_WD40EFRX-68N32N0_WD-WCC7K1234567Then the drive with serial WD-WCC7K1234567 in lsblk is that pool member. Find it, label it, replace it if needed.
This is the whole exercise in one picture — zpool status on top, lsblk below, and each pool member traced to its serial number:
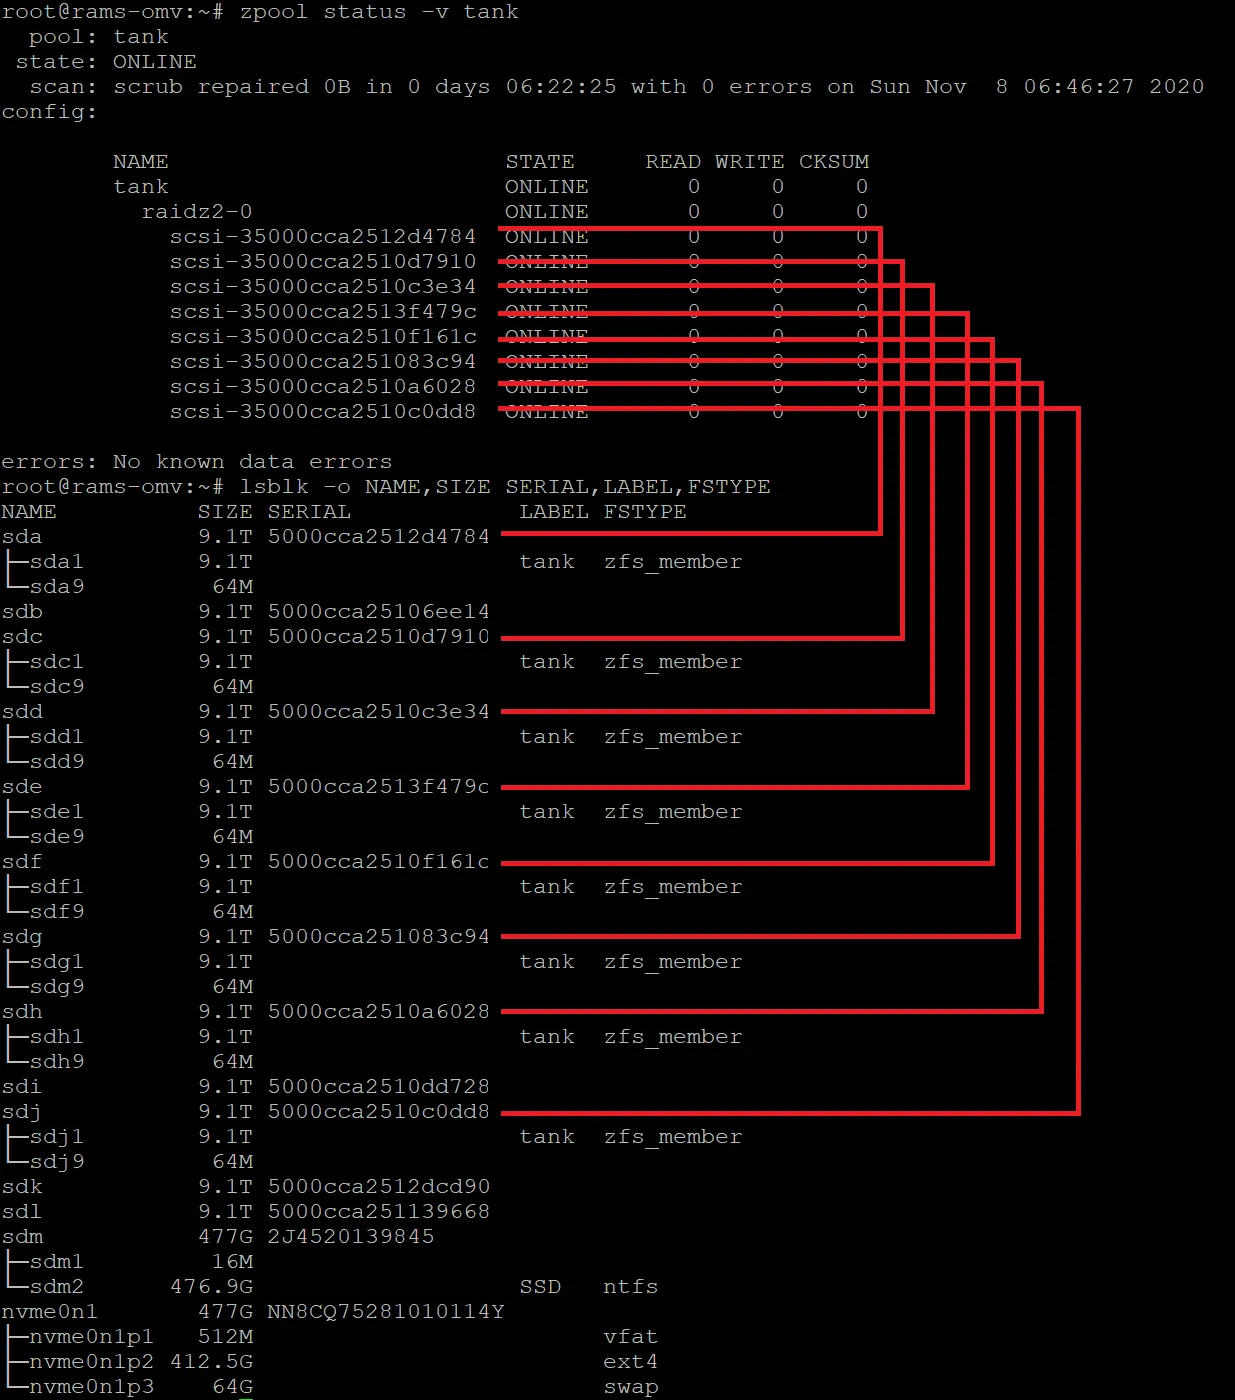
(From my own OMV box — drawing the lines by hand once taught me more than any documentation did.)
Practical note
If you’re building a new ZFS pool, always specify disks by their /dev/disk/by-id/ paths explicitly. Even if Proxmox or TrueNAS does this for you automatically through the UI, it’s worth understanding what’s happening underneath — especially when you’re debugging a degraded pool at some inconvenient hour.
Label your physical drives with their serial numbers. A label maker is a ten-dollar investment that pays for itself the first time you have to hot-swap a disk in a populated enclosure.
Relevant reading: Arch Wiki on persistent block device naming; the udev(7) man page; Oracle ZFS documentation.
Next in “Proxmox storage, in the order you meet it” LVM Thin Pools in Proxmox →