LVM Thin Pools in Proxmox
Proxmox supports two flavors of LVM storage: regular LVM and LVM Thin. They behave very differently and the distinction matters. This covers LVM Thin specifically — what it’s for, how to set it up, and where it fits alongside ZFS.
LVM vs LVM Thin
Regular LVM allocates storage up front. Create a 50GB VM disk on a regular LVM volume group, and 50GB is reserved immediately — whether the VM uses 2GB or 48GB of it.
LVM Thin (thin provisioning) allocates on write. Create a 50GB VM disk on a thin pool, and the pool only consumes space as the VM actually writes data to disk. This means you can technically provision more total disk space across VMs than you have physical storage — a practice called over-provisioning.
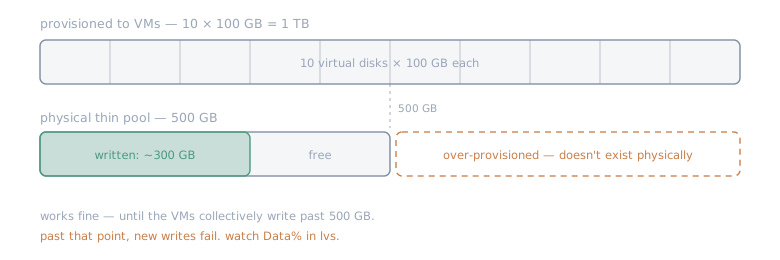
Over-provisioning example: A 500GB thin pool could host 10 VMs each with 100GB virtual disks (1TB total provisioned). As long as those VMs don’t collectively write more than 500GB, it works fine. The risk is that if they do, writes start failing.
Over-provisioning sounds reckless, but in practice most VMs don’t use their full allocated space. It’s a useful tool for lab environments and development setups where you want flexibility without carving up storage rigidly upfront.
ZFS or LVM Thin?
Both support Proxmox snapshots efficiently. The main differences:
LVM Thin:
- Lower overhead — no ARC cache consuming RAM
- Works well on systems with limited memory (4-8GB)
- No built-in checksumming or data integrity verification
- Simpler to reason about for straightforward VM storage
ZFS:
- Checksumming and silent corruption detection
- Better snapshot semantics (COW at the dataset level)
- Higher memory requirements
- More features overall, more complexity
For a dedicated homelab node with plenty of RAM, ZFS is usually better. For a low-RAM box or when you want dead-simple storage, LVM Thin is a solid choice.
Setting up LVM Thin in Proxmox
Step 1: Create a Volume Group
First, create an LVM Volume Group (VG) from one or more physical disks. In the Proxmox UI:
- Go to your node → Disks → LVM
- Click Create: Volume Group
- Select the disk(s) to include
- Name the VG (e.g.,
vg-local)
Or via CLI:
# Initialize the disk as a physical volumepvcreate /dev/disk/by-id/ata-YourDisk-SerialNumber
# Create a volume group from itvgcreate vg-local /dev/disk/by-id/ata-YourDisk-SerialNumber
Step 2: Create the Thin Pool
In the Proxmox UI:
- Go to your node → Disks → LVM-Thin
- Click Create: Thinpool
- Select the Volume Group you just created
- Set the size — leave some headroom (85-90% of VG size is reasonable)
- Name it (e.g.,
data)
Via CLI:
# Create a thin pool using 90% of the VGlvcreate -l 90%VG --thinpool data vg-locallvcreate will warn you about chunk size and zeroing on large pools — informational, not a problem:

Step 3: Add to Proxmox storage
This happens automatically if you created the thin pool through the Proxmox UI. If you used CLI:
pvesm add lvmthin local-lvm \ --vgname vg-local \ --thinpool data \ --content rootdir,imagesIt’ll appear in Proxmox storage and be selectable when creating VMs and containers:
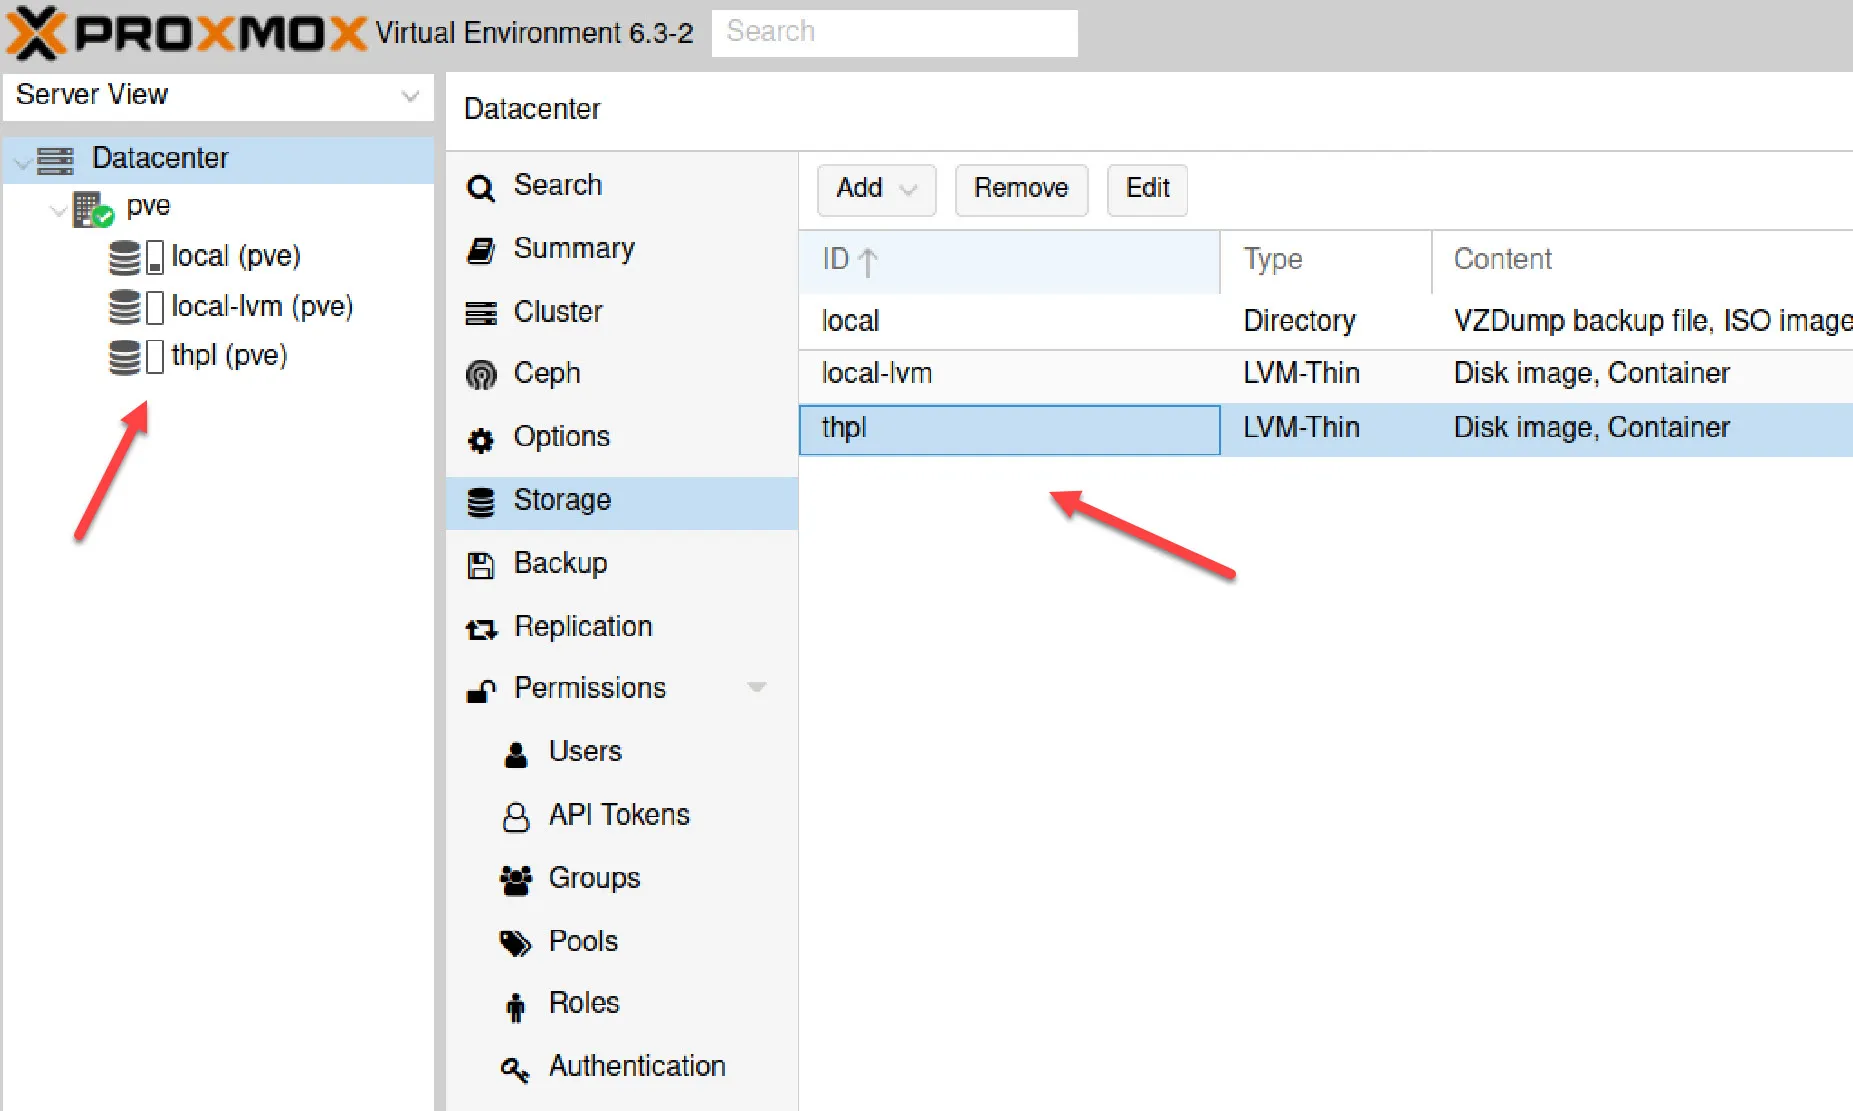
(Screenshots are from an older Proxmox release — newer versions restyle these dialogs, but the fields and the workflow are the same.)
Combining multiple disks
If you want to span the LVM VG across multiple disks for more capacity:
# Add more disks to an existing VGpvcreate /dev/disk/by-id/ata-AnotherDisk-SerialNumbervgextend vg-local /dev/disk/by-id/ata-AnotherDisk-SerialNumberNote: LVM by itself doesn’t provide redundancy. If either disk fails, you lose data. For redundancy with LVM, you’d need RAID underneath (mdadm) before LVM, or just use ZFS with mirroring instead.
Managing thin pools
# Check VG usagevgs
# Check thin pool usage (including over-provisioning)lvs
# More detailed viewlvdisplay vg-local/data
Watch the Data% field in lvs. If a thin pool fills completely, new writes will fail. Set up monitoring or alerts before you over-provision aggressively.
Snapshots
LVM Thin snapshots work well in Proxmox. When you snapshot a VM in the Proxmox UI, it creates an LVM thin snapshot underneath — space-efficient and fast. This is one of the main reasons to use LVM Thin over regular LVM for VM storage.
Regular LVM snapshots are a different mechanism and much less efficient. Don’t confuse the two.
Related: ZFS storage in Proxmox — for when you want checksumming and more robust data integrity at the cost of more RAM.
Next in “Proxmox storage, in the order you meet it” Passing physical disks to Proxmox VMs →